Price: $314.40
(as of May 19, 2024 16:42:44 UTC – Details)
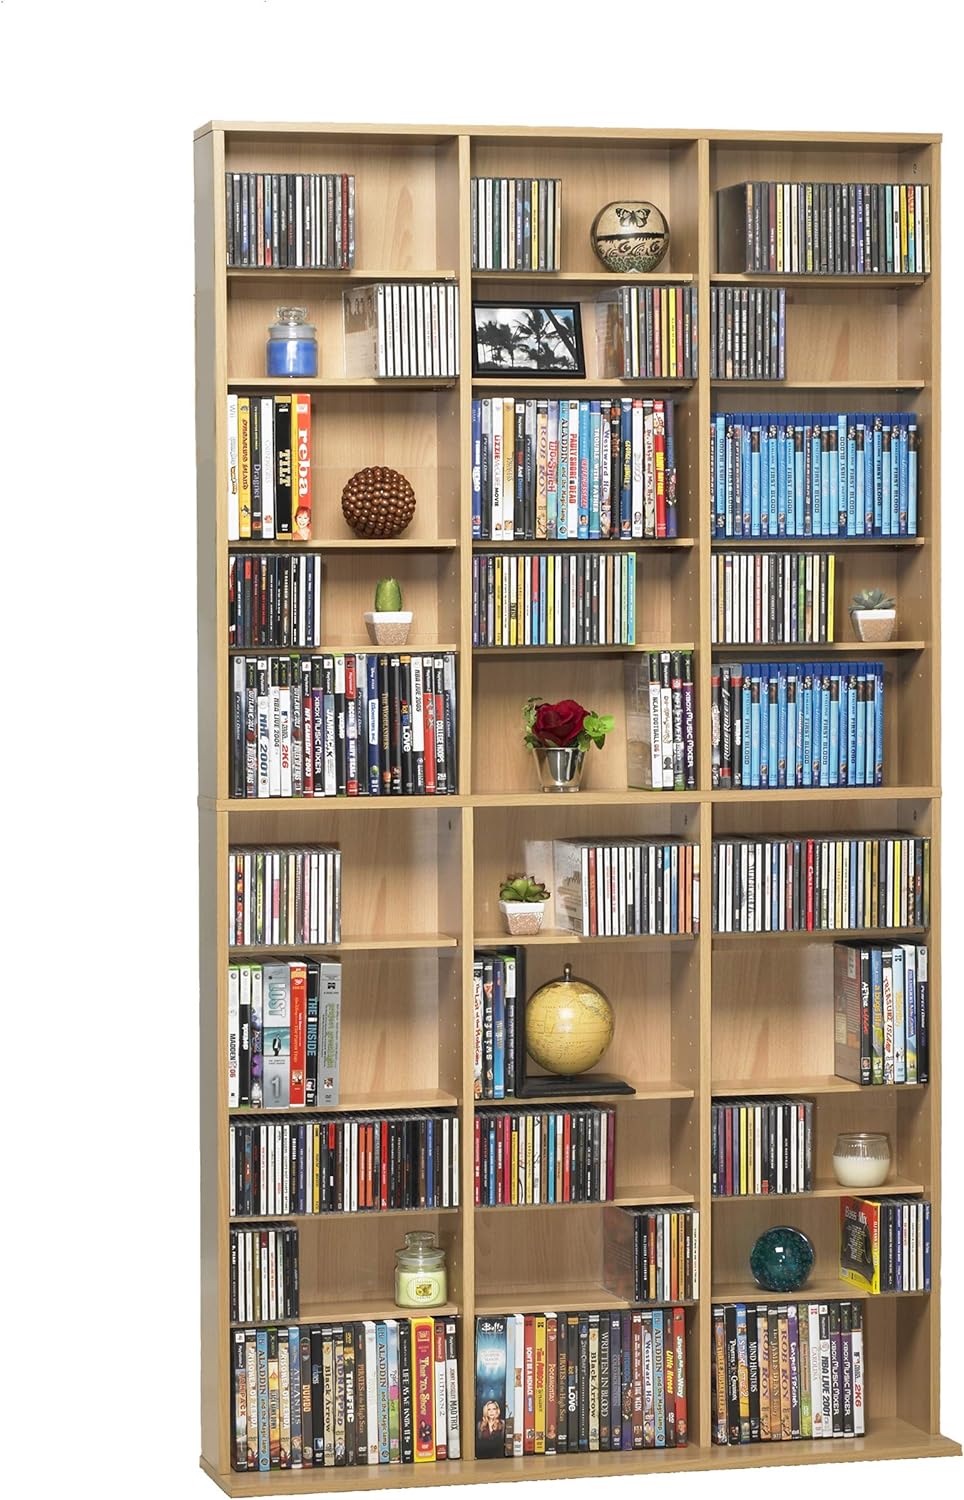
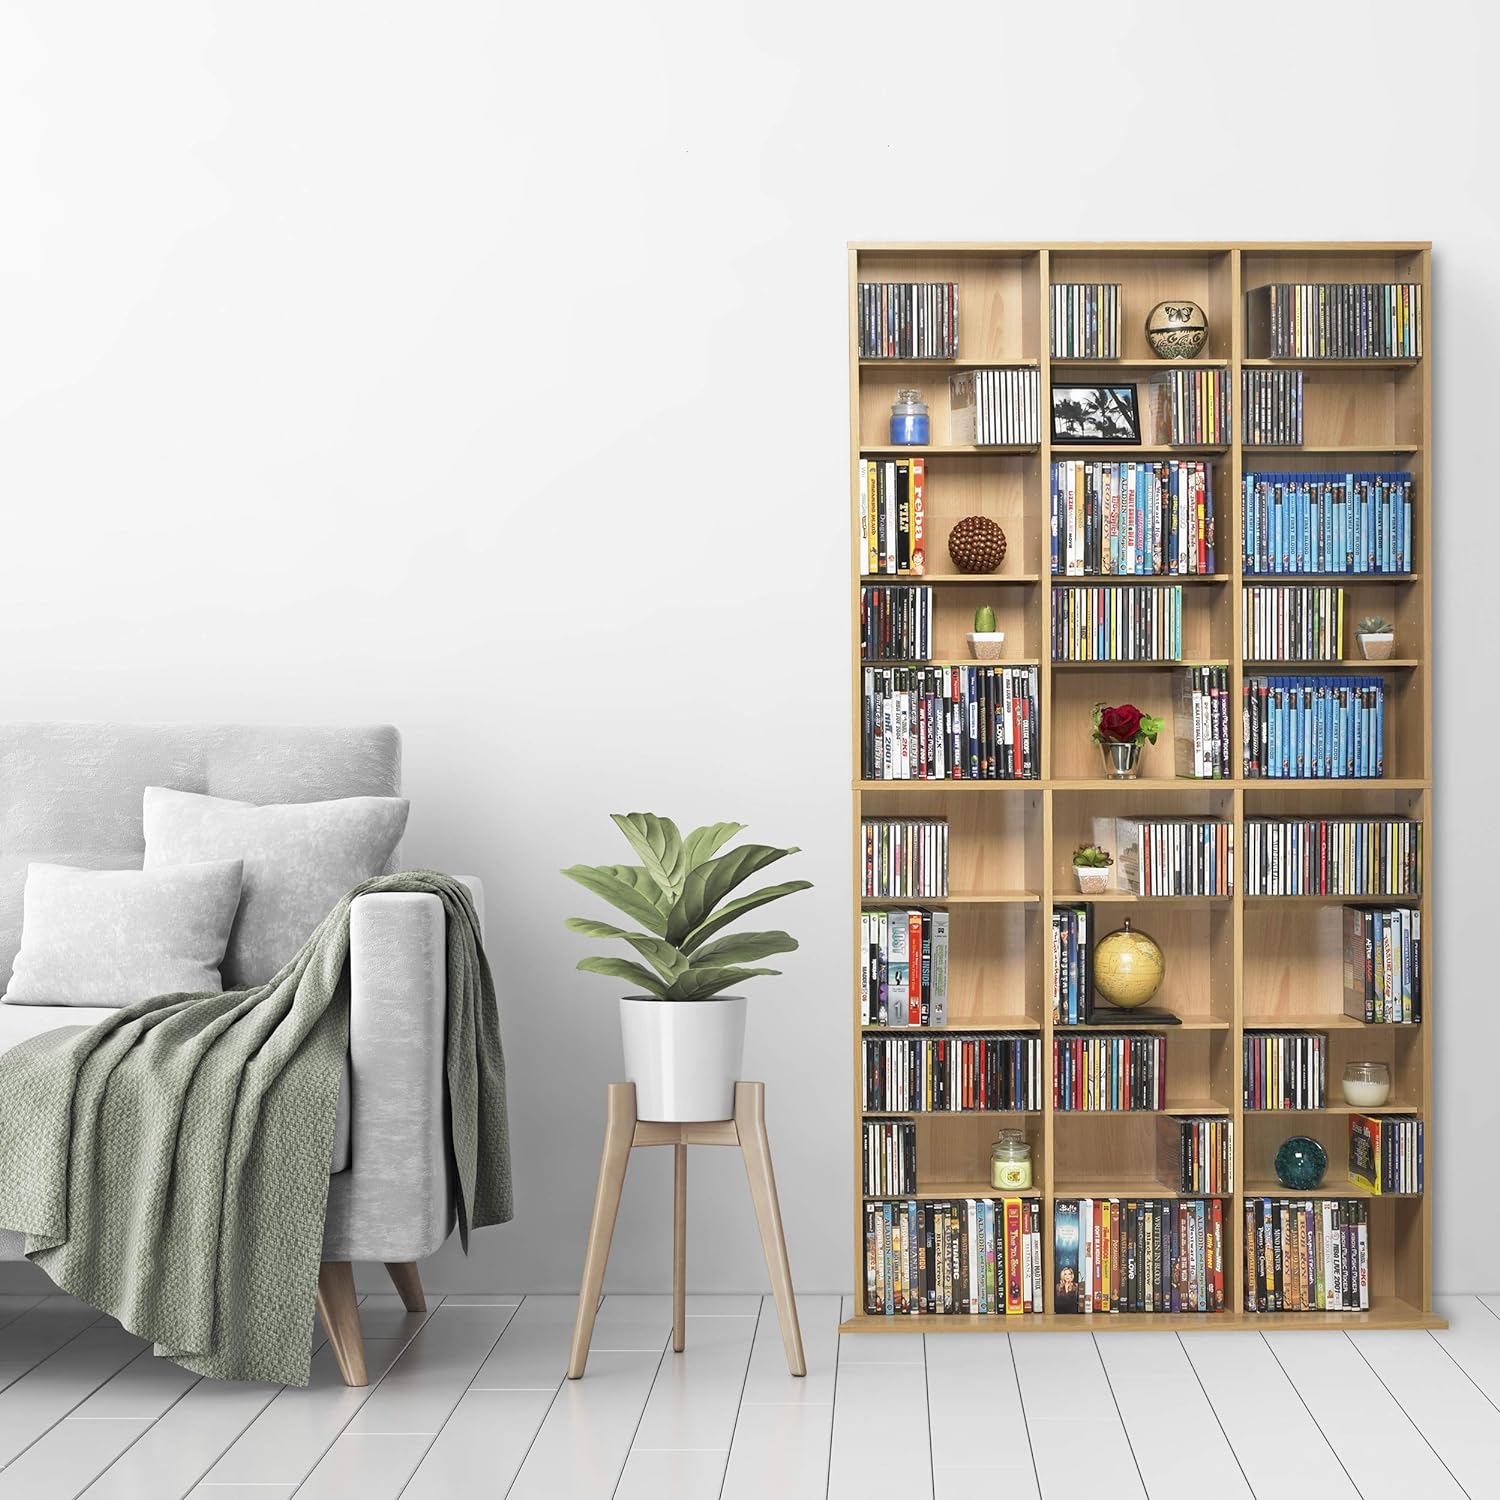
The Oskar 1080 media wall unit has a high capacity to meet all media storage needs. Features a wide base to provide stability, and adjustable shelves for better media organization.
Is discontinued by manufacturer : No
Product Dimensions : 22.86 x 104.14 x 182.88 cm; 28.12 kg
Date First Available : Oct. 19 2011
Manufacturer : Atlantic
Place of Business : SANTA FE SPRINGS, CA, 90670 US
ASIN : B0058O8GWW
Item model number : 38435715
The ultimate high capacity multimedia cabinet for all of your media storage needs. Fully adjustable shelving allows you to customize to create any storage configuration. Wide base provides stability for your collection. Mdf wood look in Maple
Adjustable shelves for better media organization.
Length: 40.00 width: 9.13 inch Height: 71. 25 inch weight: 61. 50 lbs.
Features wide base to provide stability. Durable frame with high capacity to meet all media storage needs. Wall anchor included.
Cd capacity 1080 DVD capacity 504 Bluray capacity 576 Gaming capacity 504 Wii 576 PS3






















 Unique and Sophisticated Gifts for Mom






Sam Nicol –
Good value, good looking
Feels very unstable when under construction, but don’t panic, it all firms up nicely in the end! Looks good once assembled.
Don –
Careful when assembling
Relatively easy to assemble. Follow the directions and you will have no issues. Two people required. Not sturdy until back is nailed on and screwed to the wall. Will hold 600+ cdâs. Compact and looks nice. Not a quality product but decent value for the money.
Aaron –
The best shelving unit for large media collections
As a Canadian this can be a little on the pricey side for what you’re getting, however if you’re looking for a really tall shelving unit for holding media this is the best shelving unit out there. This will hold DVD cases, CD cases, NES carts, figurines, and other collectibles and looks fantastic.The only drawback that I can see is there is a stationary shelf about halfway up that can make it difficult to get the spacing you want if you fill this shelf up. But that’s a minor issue and you can work around it easily.I previously used theÂ
Drew Waveryn –
Where do I begin?
Firstly, it wasn’t shipped for nearly a week. When I unpacked it the top shelf was damaged, but having read other reviews, I knew not to bother contacting the seller and decided I could live with the damage. The foam packing used had crumbled and got everywhere. I had to vacuum every last piece of that came out of the box to get rid of it. The static made it almost impossible to clean up any other way. I keep finding little bits of it all over my house. The hardware came in a blister pack, but it was broken and the pegs for the shelves were everywhere in the box. Some were missing and must have fallen out of holes in the box. Luckily for me, I didn’t need them all or I would have had to make a trip to a hardware store to buy more. Assembly is quick, but very frustrating. The instructions say to assemble face down, but because the base is deeper than the rest of the unit, it buckled in the middle and the threaded plastic plugs for the anchor screws pulled out of the particle board. If you dare to attempt assembly face down, make sure to have support in the center of it or you’ll have a struggle on your hands. I ended up assembling it on its side which wasn’t easy because the vertical supports are so loose and wobbly. I needed five hands to do it. All-in-all, it was a nightmare to assemble and looks shabby because of the broken top. Certainly can’t recommend this item.
Sundar Ronda –
which worked better than the original once
Ok, I bought two of these, and put them up last week. I always thought that Ikea was cheap, but this system is even cheaper, OMG this is cheap material. It’s incredible flimsy, and fragile. Putting these cabinets up, was a challenge for me, because you need to be so careful not to wreck or damage the thing, I used a battery drill on the screws and this simply destroyed them. I had to use a few of my own home depot screws, which worked better than the original once, there where no instructions on how to put this thing up, so I had to go to the American Walmart website who had the instructions posted online on their website. I put two up next to each other, against the wall it certainly needs the wall anchors otherwise it would simply tumble down. I put two cabinets next to each other, but they don’t line up properly one sticks out more to the front and I the spaces in between aren’t the same everywhere, so that some shelves are looser and others are more tight. I used a lot of wood glue to make the thing more sturdy, I am not sure if this did anything. Moving these cabinets aren’t a option for me because they would simply be destroyed while trying to move them (The backboard is holding everything in place). One of the cabinets wasn’t even complete!? It was missing certain holes, and missing the plastic screw plugs, I put it up anyways because it was the first cabinet I was putting up and didn’t know any better (This didn’t help my frustration level it was peaking). These cabinets are Chinese craftmanship at it’s best. I bought these for my Dvd’s, books, and NES collection, the multi functionality of these cabinets work fantastic and that is the only reason I am keeping them. I can put so much stuff in these cabinets it’s incredible, you can adjust the shelves to your needs, and it makes your collection totally transparent and the choice of a title so easy. I think these cabinets are way overpriced, and I understand that they come from the US, where there cheaper and shipping and handling is higher for Canada, but these cabinets should be half of the price they are asking. These cabinets are definitely not making it through the next generations of your heritage, as long as you don’t move them and treat them like you would treat your grandmother it will last you maybe 20 years. I wouldn’t be surprised if the cabinets warp, change colours, or peel from the different temperatures and lights in your house. The colour Maple looks like a American taste from the 80′ or earlier, I didn’t had choice I needed the lighter colour for my room setting but it is one ugly and out of fashion colour. Black would have been a better choice if your room allows it.
Judith McDougall –
More than just a media unit
Extremely happy with the purchase of this product. I purchased the shelf unit with the purpose of using it in my pantry to store dry good food products. Happy to report that there were no missing screws and hubby found the assembly much easier than some past projects. Love the adjustable shelves and the fact that they are just deep enough to store canned goods. Finally I can walk into my pantry and at a glace see what food products I have on hand.
Michael E. –
The hardware provided with these shelves is cheap and either doesnât fit or easily breaks.
I used this product to hold a CD collection. The shelf pins easily fall out because the holes are drilled too large. The fastening hardware is made of cheap metal that easily breaks. I had to replace a number of pieces. These problems make the unit over-priced and poor value for the money.
John Rogers –
I have a decent sized gaming collection of over 1500 physical games from a large variety of gaming consoles I have collected over the years. I purchased two of these cabinets to help me with storage. I also have two other storage cabinets that are much shorter.I have a lot of good things to say about these cabinets, and just a couple of issues with them. Let’s discuss the good first.GOOD POINTS1) The cabinets shelves are just right for storing games, blu-rays, etc. They are at a good depth so that the games are not hanging over the edge, but not so deep that space us wasted.2) The shelves are adjustable for height, at least for the most part. (One of the issues will be discussed under the not-so-good points.) So not all video games cases are the same height. These shelves all adjust height, which is perfect for some of the more unique video game requirements. All of the standard sized cases fit within 7 inches of shelf height. In the PS4, Xbox One, Switch generation the cases are not as tall. You can either shorten the shelves to make space, or stack the games flat with their spines out if you have too many. The issue comes with games like Sega Genesis and Nintendo 64. They are not nearly as tall and they have rounded tops that makes stacking them difficult. To solve this I was able to split the shelves into 3.5″ height and then store those games on their flat bottoms. It works very well and keeps dust out of the contacts. I know there are cases you can buy, but I currently have 88 N64 and 50 Genesis games and it’s just too expensive to buy cases for all those games.3) Once the units are assembled they are very stable. They even have a way to attach them to the wall if stability is a concern. Without the shelves in place the cabinets can seem a little flimsy. But the shelves are part of the structure, and once they are in place everything firms up quite nicely.4) I really like the look of the units. They are clean and sleek looking and fit really well in the room. Also since they don’t stick out far into the room they are efficient and compliment my collection rather than dominate the wall as some cabinets I have tried in the past.NOT-SO-GOOD POINTS1) The top, bottom and middle of the units is not as flexible for placing shelves. The holes on the sides for placing shelves stop quite a ways before the top and bottom of each section. This means you have to plan your needs to have taller items in those areas, whether you like it or not. So that means you are forced to have taller shelves in four areas of each cabinet. It’s not terrible, but it is something to be aware of, especially if you are trying to keep games from of smaller size or of same manufacturer grouped together.2) This is a small but annoying problem you should be aware of when putting everything together. I recommend studying the diagram very carefully so that you don’t put anything together upside down. Pay attention to the holes for the sides and how they should orient together. Also know that the bottom goes on before the back, which creates an issue with getting the back nailed on since the unit wants to come apart in the middle since the front of the unit is not flush with the bottom (it’s the back of the unit that’s flush). My first cabinet did not go together so well because I did not fully understand what the diagram was showing me and because one of the metal twist rings that hold the top on crumbled The moment I turned the screw. The second one was much easier. Fortunately when the back is on and the shelves are in place it firms up nicely. Just be careful moving the unit when the shelves are not in it.Please understand that the good points far outweigh any not-so-good points. If I ever get rid of my other game cabinets I would not hesitate to get another couple of these shelving cabinets. I highly recommend them for storing games and movies.
D. L.P. –
Important! How to assemble– I bought these for the size and capacity and read the comments about how to put together so it doesn’t snap. I thought I figured it out for the first one, it snapped, then I figured it out for the second one and it went together in 30 minutes quicky, smoothly, and with NO issues. No breaks, nothing. And looks great.Below, I have tried to make clear the steps I followed for a very successful build–bear in mind, the other comments were helpful, but did not make the steps clear.Here is how to do it, from someone who is not skilled, but was able to build in 30 minutes with no problems:1. Build the top first. And that means connect the top piece of wood as well. Build with the finished side facing you.2. Turn over.3. Nail the correct backing to the top.4. Now, work on the bottom. Build with unfinished side up.5. You are “changing” from the instruction page here.6.The wooden sides are opposite the instruction picture because you need to building this bottom section with the unfinished side up. This is key. If you don’t, it will snap when you turn over. It is unconnected, unsupported, and if you follow the instructions, it HAS to snap.7. You need to build this opposite way so you can nail the back on it easily for support. This is the Holy Grail bit of advice for building this–if you follow, it will be perfect.8.Just keep the same wooden sides next to each other like the picture, but in reverse since it is upside down from the instruction photo. Translation: the letters on each piece of wood need to be next to each other like the picture, just turned so that the shelving pin holes make sense.If I can figure that out, anyone can.9. Because the base sticks out, it won’t be flat when unfinished side is facing up. That’s another snapping issue.10. I used 7 of the little shelves to place under the sides to “level.”11. Screw in the sides, and level them as well for support.12.. You should be ready to join the 213. BUT here is where it can snap.14. Put levelers (I used the styrofoam and cardboard from box to make the Bottom half as high as the the unconnected top half (which should still be on the levelers.)15. Slide the bottom over to the finished top–which is heavy and supported.16. Note: I put some wood glue on the wood pins, but it does not matter.17.Both halves should be same height, and you should be able to position the bottom (unfinished side up) into the pins without any problem or stress whatsoever.18. Push together and tighten those cam bolts.19. IMPORTANT20. Nail the second backing panel into the back. Use all the nails and make secure.21. Congratulations, the hard part is over.22. It should be stable, but I turned it on its side, and slid it to where it would be resting.23. I did this by myself, and it was perfect.The problem with all the other reviews saying build it side first and nail on the backing–they did not say when you had to change from the instructions, and that created confusion.I hope this helps! It certainly made it easy for me, and I just ordered 2 more.When built like this, it really was as advertised!
Kenneth D. Ladage –
I was not looking for “premium” furniture. After all, I was looking to get a shelving unit for my DVD and Blu Ray collection on Amazon. I knew it would be particle board or the like and it would come “some assembly required” and all that. I wasn’t looking for anything fancy — just functional.In the realm of sub-prime, built-it-yourself pieces, there are “inexpensive” pieces of furniture, and their are “cheap” pieces of furniture (which may or may not be inexpensive). But, few feet below those categories, lies “crap” furniture. The Atlantic Oskar 1080 Media Storage Cabinet lies somewhere near the bottom of the “crap” furniture pit, awaiting its next victim. From the instructions not being clear (causing several “back-up and try again” moments), to the fact everything about this unit screams “lowest bidder,” the product fails to impress on any level.The unit comes top and bottom halves, which are held together with a sort of lock-bolt and screw mechanism. I have used this type of connection before, but in those earlier instances, the screw portion goes into wood. These go into plastic inserts within the boards which, as you can probably guess, are not in tight enough to get a good grip on anything. This is because the boards simply do not have enough material — enough wood — for anything to grip onto. As a result, after getting this together, I went to stand the unit up, and the two halves came completely apart, breaking several of the verticals.Two things about standing this thing up: (1) when you assemble the unit, you must keep it lying flat on the ground with the finished edges up. This is not made clear in the instructions. It was not until I was trying to put the bottom of the cabinet onto the verticals and realised that the forward facing lip of the base has to be facing up to do this, that I realized my mistake; and (2) once the top shelf and base are affixed to the verticals, you have to somehow turn the whole thing over, have the lip on the base hang over something so you can keep the unit flat, and affix the back panels. There are many issues here (that lip being a major one). But remember above when I said that there is very little material to the wood? Yea, now consider the miniscule brads that are used to put the back boards on and consider how well those are going to grip keeping this back on and you can see the other major issue.Oh! And those backing boards? Yea… the unit comes with two of these. One covers the top half and the the other the bottom half. Do you see a problem here? Neither did I at first. It was not until I went to stand the unit up that it became evident. Since the unit has such flimsy connectors holding the two halves together, and the backing boards are split along these halves, there is no rigidity to the two halves — they are not a unit in any way, they are effectively two free-floating pieces that are intended to be stacked… held together by hope and a prayer. As my wife and I stood the unit up, the two haves (now under a modicum of pressure), completely split apart, with the screws and plastic inserts breaking free, cracking and breaking the pseudo-wood in the process.After a few choice curse words were uttered, I took the two halves, separated them, then looked at the damage to the boards. With a lot of glue, I have managed to Frankenstein the two halves together (some parts of this are not very pretty, but I put those broken parts against a wall and have decided to ignore it for now. Rather than using the wall anchors as depicted in the instructions, I put one at the top of the bottom half, securing the middle horizontal to the wall, and one at the top of the top half, securing the top horizontal to the wall. It is secure.This thing will due for now. At some point, I will replace it with something that is designed and manufactured to a higher standard. I know… that does not really narrow down the field very much — if at all. But I am too tired and too frustrated to deal with the idea of trying to return this dumpster fire.Atlantic is a company that will not be getting any more of my business.
Bookaholic –
Brief- I recommend this product for many reasons detailed below. Just wrote a longer review so people know what they are getting and getting into. I had assembled a couple similar ones in the past but it was long enough ago that I had to re-learn some lessons. Keep reading and it will save you time and (maybe) trouble.Long:Assuming you already bought this then read before assembling. If you haven’t yet then there are a few things you would want to know prior to purchase.First — For those who are about to build the unit:In step 4 they indicate not to overtighten the wood screws (T). As the unit is made of particle board, overtightening the screws might cause the wood to split. This is potentially a cosmetic problem but not a major issue.What the instructions FAIL TO MENTION is that in step 3 it is CRUCIAL not to overtighten the part “P” bolts. The fitting into which they insert is plastic while the bolts are metal. Years back, similar products used a metal fitting, but no longer. Therefore if you tighten the bolt it will continue to screw into the fitting and leave an insufficient amount of length for part “R” to clamp to. If you make this error it is easy to fix by backing “R” out a bit. Best practice if not in a well lit room is to tighten R using a flashlight to see the residual air gap between it and the board. Once this is no longer visible STOP. Tolerances are very tight and any further will lead to the unit being unstable as these joints will separate when under any strain.The other tip is to have an assistant available for at least 5 minutes at the end of the assembly process with a work-around indicated in the text below if you do not.—-As to a review of the actual product.There is good news and bad news.The (not very) bad news is that an identical unit purchased 10 years ago was of better overall quality – the shelves were deeper and thicker (not an issue as the weight they hold is minimal) with better hardware to keep them in place. The current metal pins for that task are smaller while the holes they go in are not so they are apt to fall out until you actually fill the shelves to put some tension on them. It just takes a bit of patience putting them back in but in the end they work fine. The shelf depth becomes a consideration if you have this in a public space since they now measure a hair over 4.5 inch rather than just under 5.5 in. As a result, the ends of dvd/blu ray/CD cases will overhang the end of the shelf which may not be cosmetically pleasing to some (on the upside- no dusting!).That’s really it as far as bad news.The good news is that this does what it is supposed to, isn’t unattractive and will hold a fair number of items.It will arrive in a fairly unwieldy package. I will repeat this a couple of times to make sure the point gets across. This is a large heavy object prior to and after disassembly. The shipping weight is 65 lbs. In a pack or suitcase that’s not a problem to get up several flights of stairs. In a box this size and without handles it is a two person job unless you are in a situation where you can cut the box open and take the larger pieces up first and the rest later. Just something to be aware of.One really big piece of GOOD NEWS is that the box is thick cardboard with considerable foam packing to keep all the pieces from moving around during transit and while not indestructible it should survive being dropped from low heights during transit. After all the reviews of similar items I read complaining about damage which happened prior to arrival, I didn’t take this as a given. Unless they drop it out the back of the truck or drive the truck over it, you should be ok!You will need floor space larger than the final size of the unit to be able to assemble it (for those who haven’t before). The instructions have you assemble the whole item face up (finished side up) then flip it over to put the back on it. (as an aside my unit conveniently had the stickers on each part located on the inner face of each piece making it less likely one would end up with it pointing the wrong way [but this wasn’t specified in the instructions])Assembly was straightforward and should take 30-45 minutes with a screwdriver and hammer (a little longer if you are a newby and/or alone). Apart from getting the parts up the stairs, you really only need an assistant for about 5 minutes of that time to get the unit flipped over and from horizontal to vertical.Flipping the unit over is a bit problematic, particularly by yourself. Once all the shelves are in the unit will have considerable structural strength. It’s actually quite solid (read heavy) and my other one shows no signs of aging. Barring water damage these are likely to outlast me. HOWEVER, until the shelves are in and PARTICULARLY prior to getting the back on the thing there is not much in the way of torsional rigidity.So it is possible to damage the unit (or have it come apart temporarily) while moving it with the back off. This is more likely to happen if you are doing it by yourself and the unit is, therefore, under greater stress.As I was working alone I departed from the instructions (NOT recommending this course of action, just saying it will work). I built the top of the unit (including putting the back on carefully) then built the bottom and had that upright first and subsequently lowered the top onto it (resting the latter against an adjacent wall with a protective blanket between it and the wall). Once I lowered the top unit onto the base unit I tightened the fasteners between the two and put the back on the lower half (the latter not being nearly as easy as doing it flat but doable). It really helps to have three hands and the wall acted as that. This avoided putting strain on the unit during assembly.If you do it flat be advised that the base is wider than the rest (so it won’t tip) and when you roll the unit over so it is “face down” this will leave the middle unsupported. It is best to have something to put underneath it to help support it so that the junction between top and bottom halves is not unduly exercised (particularly as you are about to beat on the back of it with a hammer to get the nails in place). YMMV.One more thing to be advised of. The screws which go through the bottom of the unit have holes for them to be started in BUT not tapped for the screw heads. Therefore the heads of the screws will protrude slightly from the bottom of the unit (remember they said to not overtighten to avoid splitting the wood). If this is going in a carpeted are or on a rug, no issue. If you plan to place it on a wood floor then self adhesive furniture pads (small) to cover the screw heads are a must purchase.
Wesley Royal –
I’d seen some reviews that had me concerned, but for the price, this can’t be beat.I ordered the first as a cheap option for a supply shelf at work. After assembling and working with it I realized it would be perfect for displaying my Hallmark Keepsakes collection. Though, I now have a 3rd ordered, as I gravely underestimated the size of my collection.There are a few things worth mentioning.1) First, parts I &J were incorrectly labeled as J. However if you are carefully reading the directions, you’ll clearly see from the diagrams which part is which.2) Next, the metal “bolts” that screw into the plastic recessed anchors, they are easily screwed in too deep. If done as such the round twist parts have difficulty engaging. Noy to mention you risk breaking the anchor. To prevent this simplify screw them in by hand. You’ll be able to tell when they’re seated. There will probably be a few you will need a screwdriver to install. On those just go slowly and hold the piece up so you can see when the threads just disappear into the anchor.3) Lastly, many reviewers mentioned the difficulty with flipping the shelf over so as to nail the backing on. One issue was due to the unit being flimsy without the backing to help stabilize it from flexing. The other issue is, with it laying front side down, the base holds the unit up off the floor. In this position, when hammering on the back, you risk breaking the unit in half. To solve this, I used 2 folding tables I have for cookouts/workspace. Using these, I assembled the unit front side down from the beginning. I left the bottom just off the edge of one of the tables so I could attach the base and have the protruding portion if the base hang off the table. Like this the unit is flat on the table and hammering the back on is a breeze. Not to mention the entire assembly can be done from the comfort of a chair. Oh, and to get it off, simply flip it to a side and slide to the ground.On a side note, some may realize from my picture that the units bases have been modified so they fit neatly in a corner. To do this I cut the corners that meet at a 45 degree angle (3 1/4 inches measured from the exposed corner down both sides).